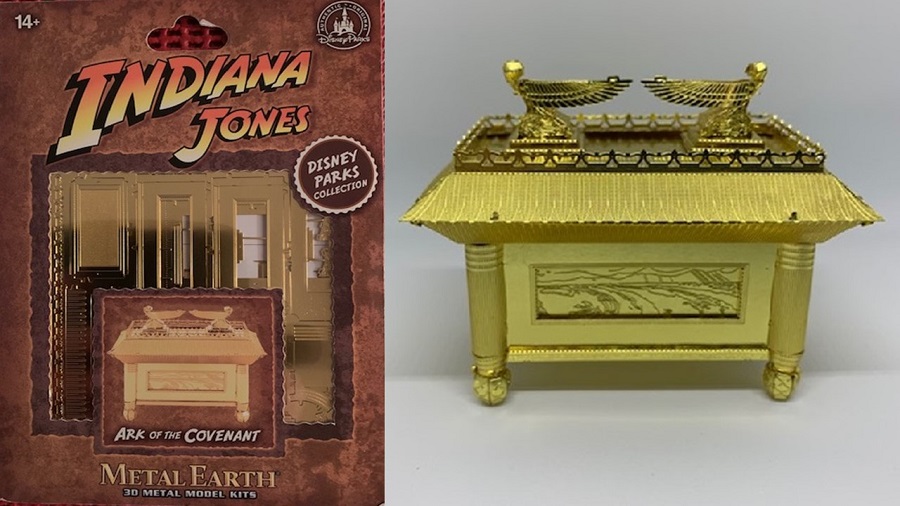
The Metal Earth Ark of the Covenant is a nice build of a really interesting subject. It makes a beautiful “golden” metal model for display.
Before we get into the build, however … a little history of the subject …
The Ark of the Covenant
The story of the Ark is from the Jewish Scriptures (the Old Testament of the Bible). God told Moses to make this chest as part of the furniture of the Tabernacle (the tent that was designed to be the house of God).
The Ark was made out of Acacia wood, and overlaid inside and out with pure gold. Inside it was kept the original stone tablets that God had written the ten commandments on. God’s visible presence (a fiery cloud) resided over the Ark.
It was so holy, that no-one was to touch or even look at the Ark. And there are stories of the Ark being captured by Israel’s enemies, and God sending plagues to them until they returned it.
The Ark disappeared into the sands of history around 600BC.
… enter Indiana Jones.
Raiders of the Lost Ark (1981)
The runaway blockbuster movie of 1981 was Steven Spielberg’s “Raiders of the Lost Ark”, which was based on this Bible story of the Ark of the Covenant.
The movie is set in 1936. Professor of Antiquities, Indiana Jones (played by Harrison Ford) is hired by the U.S. government to find the Ark of the Covenant. The clock is ticking, because he needs to get it before Adolf Hitler’s Nazis can find it and harness its awesome powers against the world.
The Metal Earth Ark of the Covenant
This kit was released under license from Disney, and sold through the gift shops at Disney Theme Parks. You can’t buy them from the normal Metal Earth retailers. They do come up regularly on eBay though, and that’s probably the best place to look if you want one – it’s where I got mine. (Don’t wait too long, however, because they’re only going to get rarer as time passes.)
There are two metal sheets in the kit, in striking gold color. The etched detail is beautiful.
Starting the Build …
Now I need to warn you right up front. The very first subassembly of this build is the hardest part of the whole thing. I say that to prepare you (and give you hope when the going gets a bit tough!)
The first task is to build the two Cherubim (angels) on the lid of the Ark. And they are quite difficult.
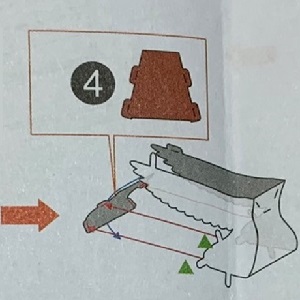
The main problem I had was attaching a very small chest plate under each figure. It’s located and held in position with four tabs that are angled in such a way that make it a nightmare to insert all four into their slots at the same time.
Confession time …
I failed with the first of the two figures. It was as close as I’ve ever come to throwing a kit in the trash. (I’m glad I didn’t.)
I ended up cutting off the two upper tabs completely, and using a spot of superglue to attach the plate. This gluing in itself was no small feat, because no matter how long I held it in place, the glue wouldn’t grab. In the end, I resorted to a quick spray of activator (ZipKicker) which did the trick.
I was left with a bit of unsightly glue, which I cleaned up by cutting the excess away with an Exacto knife.
[You might also like to read: How to Repair Metal Earth Models: The Missing Manual where I discuss the use of superglue in more detail.]
The second figure, I’m very happy to say, went together a bit better. It was still very tricky, but I had learned from the first one. By attaching the bottom tabs first, I was able to wrestle the upper 2 tabs into their slots. So, no more glue was needed!
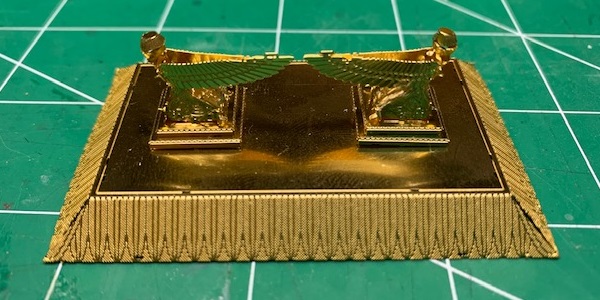
Moving Right Along
After that first subassembly, the rest of the kit goes together quite easily. It is, after all, a simple gold box!
The rectangular inlays on each side (and underneath) the Ark add so much to the model, and they are very easy to put together. But I’ll share a little tip. This is one occasion when a tool I’ve talked about elsewhere came in very handy …
The inlay pieces require some simple 90 degree folds, but these folds are quite long (almost an inch and a half). So if you bend them using tweezers, it’s easy to end up with an uneven result. That’s because the tweezers are gripping one point along the fold each time. The most common way to overcome this is with a pair of needle nose pliers. You use the whole length of the pliers to grip all the way along the fold. This works much better.
But the tool I used was my “photo etched parts bender” (which I discuss in detail HERE). It worked beautifully for these inlays, and I ended up with really straight, crisp folds in mere seconds.
One Final Tricky Bit: Those Rounded Feet
The Metal Earth Ark of the Covenant kit begins and ends with a challenge …
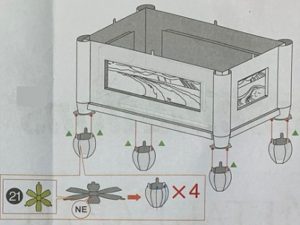
The very last thing you have to do is shape and attach the four “feet” at the bottom of the Ark. I’ve read comments from several people who found this quite difficult.
Well, I didn’t have any trouble. I tried a simple technique on the first one, and it worked perfectly, so I continued the same way with all four. Here’s my method …
I got the shaping started with a pair of tweezers, slightly bending each “branch” of the star-shaped part in three “steps” working from the inside out. I ended up with 6 curved branches that did not yet meet. Like an opened flower …
Then, I simply held the part between my thumb and index finger and gently “rolled” it back and forth. As I did that, the branches bent very uniformly into the right shape, lining up correctly at the top. When I them came to attach the feet to the Ark, the tabs lined up with their slots perfectly!
So, give that a try when you get to the final step.
The Finished Model
I really did enjoy building this kit, despite the troublesome start. And the finished product looks great on display in my 3D metal model collection. I thoroughly recommend it to you.
You may have questions, or perhaps you’ve built the Metal Earth Ark of the Covenant and have some comments to add? Leave your thoughts for us below.
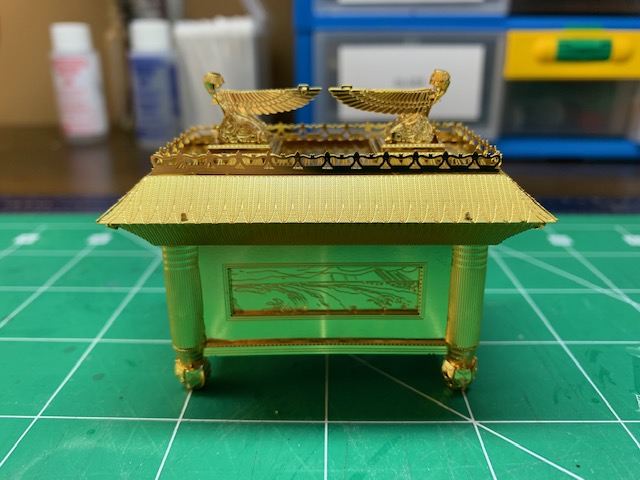
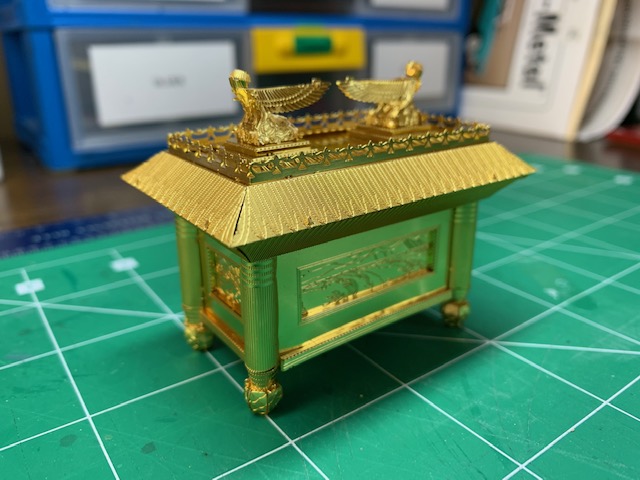

I just finished building this one today! I lost a few “petals” from the feet, unfortunately, so I had to use super glue. But it sure is a gorgeous model!
HI! great post thank you.
I was wondering – our kit did not include instructions and i can’t find them on line. Any chance you know how to access the instructions?
Thanks in advance!
Hi Scott,
Sorry I didn’t see your comment before now.
You can get a lot of the Metal Earth instruction sheets here … https://www.metalearth.com/instructions
But I don’t think the Ark is still listed.
Maybe ask the Reddit group?
Wish I still had mine to send you. Phil